Analysing iPhone network traffic communication with Burp suite
In this blog post we are going to explore how to analyse all the network traffic communication, packet by packet, send from your iPhone. For this we are going to use Burp.
This will allow us to gain insight on how apps interact with API’s, which data they are sending and much more. It’s fascinating to see what happens in the background the moment you open an app.
In my previous post I have already hinted at my dissatisfaction on seeing how much analytics data is shared about you.
After this tutorial, you’ll be able to find this out for yourself. Let’s go!
If you are interested how an iPhone app interacts with the Internet, this post is for you.
The setup
For this tutorial/research we are going to pipe all the network traffic from the iPhone through a proxy server on our computer. We will also need to install certificates (which you can remove later) on the iPhone to allow HTTPS communication.
This is also the reason, I believe, this tutorial won’t apply to android devices, as the latest android versions don’t allow root certificate installation.
This tutorial was made using an iPhone running iOS 11, but other versions will (or should) work just fine, just with slightly different steps.
Installing the necessary software
On your computer, go ahead and download and install the Burp Suite Community Edition here (it’s completely free). Also, it should work on all platforms.
Also, make sure, that your devices are on the same network.
Starting the proxy server
Start Burp suite community edition. You can select temporary project for now, and use Burp defaults.
In the Task bar head over to Proxy, then, inside, click on options.
Add a new proxy listener, bind to any port that is not currently in use. I will use port 8121. Make sure the check all interfaces.
It should look like this:
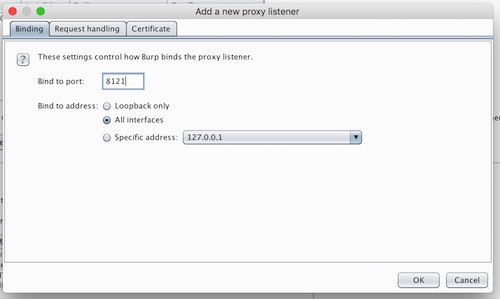
Burp screenshot 1
After that accept the warning messages.
We’ll leave the rest of the option in their default state for now.
This is how it will look:
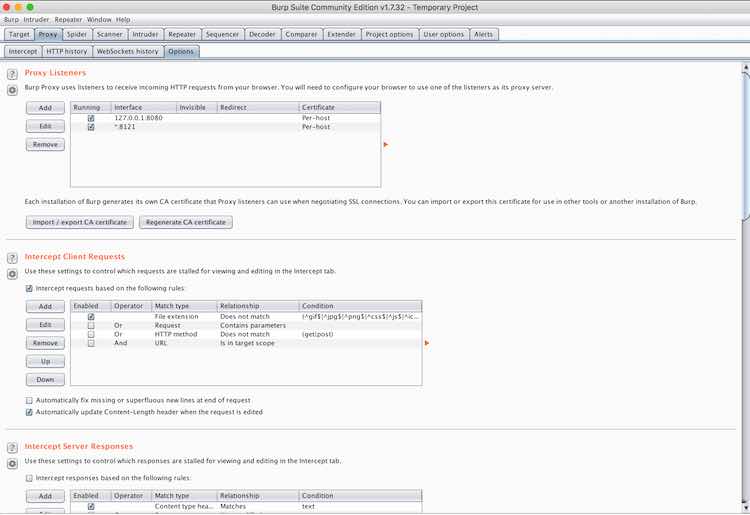
Burp screenshot 2
Now, grab your iPhone.
Connecting the iPhone
Now, we will need to pipe the network of your iPhone through the proxy server.
For this, type in the terminal/command line your computer ifconfig, to find out your IP address on the internal network.
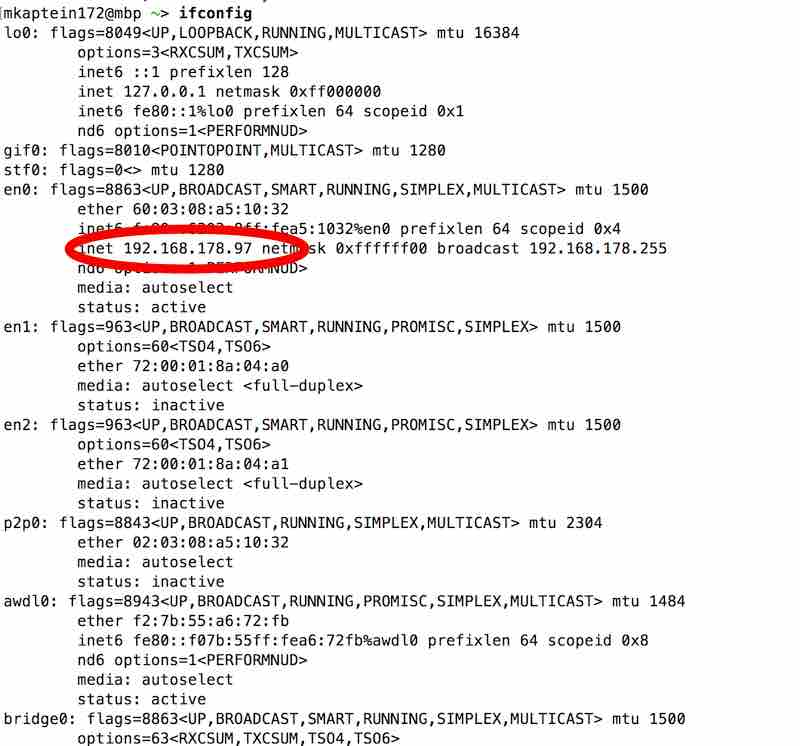
Terminal screenshot ifconfig
As you can see on this screenshot, my internal IP address is 192.168.178.97.
Take note of your address.
On your iPhone, go to settings » Wi-Fi. To the right of the network name, press the (i) icon. Then scroll down, press on Configure Proxy, and go to manual.
For server enter the address you just noted. In the port enter your port. Leave the Authentication off.
It should look something like this:
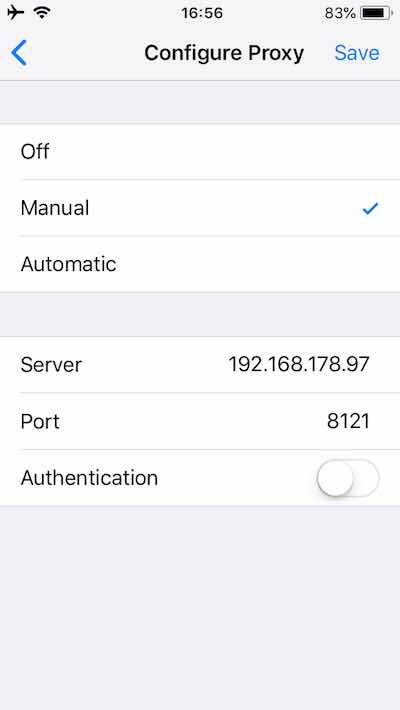
iPhone screenshot 1, proxy
Now we will install the necessary certificate on your iPhone.
Installing the certificate
Your iPhone is now connected to your proxy server.
We need to install the certificates to allow opening of HTTPS sites. This is taken from the official burp iPhone tutorial.
Open Safari and in the address bar enter: http://burp.

iPhone screenshot 2, burp
On the right corner click on CA Certificate, and allow the setup of the configuration profile.
Click Allow, then Install, enter passcode, click install and allow again.
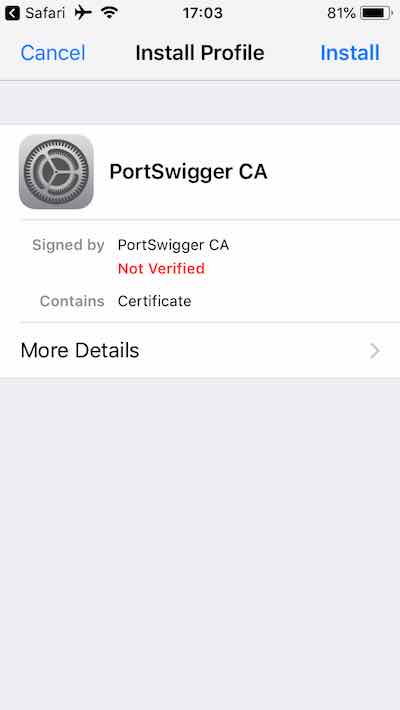
iPhone screenshot 3, certificate
After that head over to settings again, go to Settings » General » About » scroll down » Certificate Trust Settings » activate the root certificate (PortSwigger CA). Press continue.
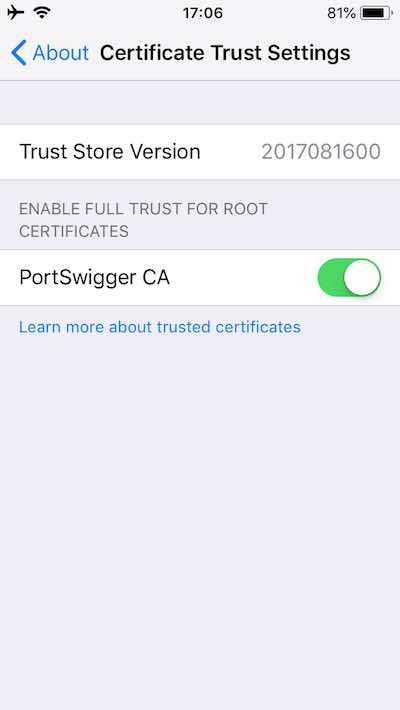
iPhone screenshot 4, certificate root
Now, we can finally begin analysing the network traffic which is coming from the iPhone.
Note: At any time you can (and should) remove the Certificates from your iPhone, once you are finished analysing. For this, just head over to Settings » General » Profiles (…) and remove the configuration profile.
Intercepting packets from your iPhone with Burp Suite
Now, you can see ALL the traffic that is send from your iPhone.
On your computer open the intercept Tab (inside the Proxy tab), there you will see all the packets that are being send from your iPhone, one by one.
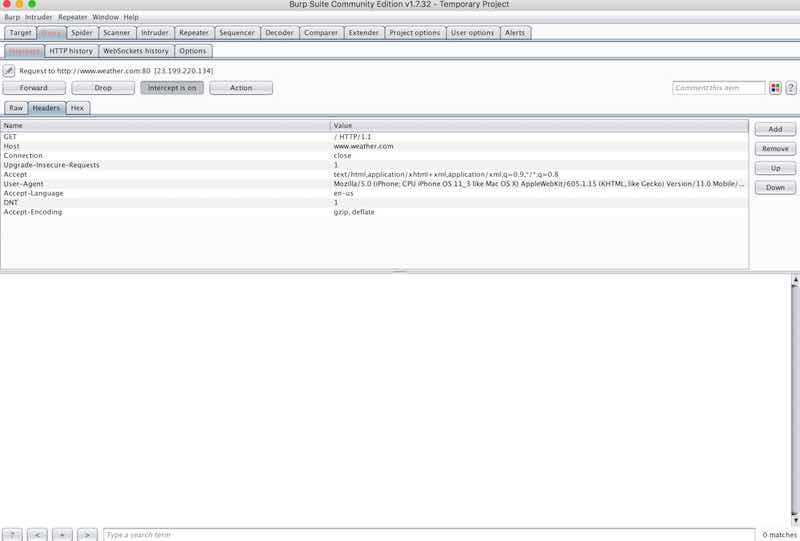
Burp screenshot 4, intercepting traffic
Of course, I won’t post screenshots which contain sensitive information (which you will see in Burp, please be aware).
Press on the Forward button to continue sending the packets, or Drop to drop them (duh).
Try opening various apps, and identify their packets.
You will be surprised to see, how much is being send.
Conclusion
You will wonder: So what?
This method is aimed at people who wonder how stuff works (I suppose you do, since you read my blog post until here). This method provides deep insight how apps work, since you can trace every packet they send.
You can assume, how their API’s work, deduct how the application is written.
For example, you can see exactly how the flight tracking app “Flightradar24” renders it’s map, and receives information. And there are countless more examples of interesting stuff happening.
I really find it amazing how much is happening in the background while we are taking everything for granted.
Let this post, fuel your imagination of all the things possible:)
PS
Don’t forget to remove the Proxy server configuration, otherwise you will not be able to connect to the internet.